
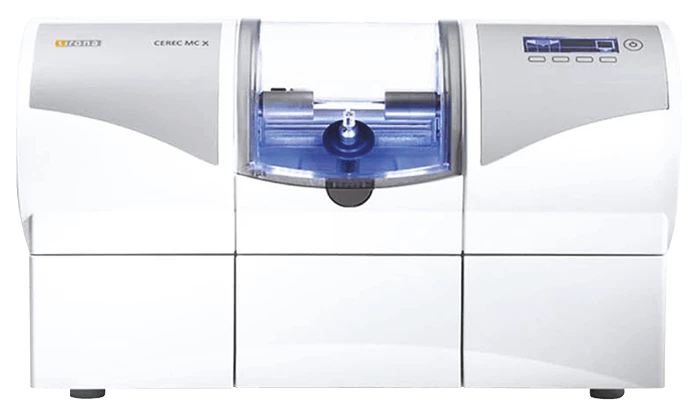
CEREC MC X
With CEREC MC, you can achieve 100 % precise results at an appealing price.
Whether inlays, onlays, crowns or veneers – you can create full-contour individual tooth restorations with block sizes of up to 20 mm. You will be able to work with the majority of chairside materials. With CEREC MC, you can achieve 100 % precise results at an appealing price.
The CEREC milling and grinding units and the CEREC software are optimally synchronised with one another. Grinding and milling the restoration design is extremely precise, giving the restorations smooth surfaces. Even very fine fissures are very precisely prepared and the edges are very even. Our new milling and grinding units can also dry mill, making solid zirconia restorations in a single visit possible!
Precision of up to 25 µm
“Treatment often used to take a long time. With CEREC I got a complete crown in just one visit – without a temporary or follow-up visits. I call that service!”
Meike Tramitz, patient from Gießen
The new CEREC grinding and milling machines come equipped with a device to vacuum up the mill shavings as well as new precision tools. The new machine can be used for both wet and dry processing, one straight after the other. Dry milling saves a considerable amount of time, as the restoration does not need to be dried before sintering – thus enabling the chairside procedure. And there is no difference in quality between dry and wet milling processes. The dry dust can easily be removed using a short, integrated cleaning program.
If you're about to invest in dental equipment, you could be able to combine your costs and benefit from Advance!
Eligible customers will receive a rebate based on their merchandise* and clear aligner spend, which can be offset against your monthly equipment repayment cost.
How to insert a block correctly into the MC X Milling Unit
How to connect the radio module HW8614/F2 to the milling unit
Zirconia rocks: Dry milling in super slow motion
Width 700 x Height 425 x Depth 420 (mm)
A MCX unit achieves precise results and you only need approximately 11 minutes to create a crown.
Inlay/onlays, crowns, veneers, bridges, abutments and surgical guides can be fabricated.
The MCX can create fully anatomical single tooth restorations up to a block size of 40mm.
No, the unit has an integrated water tank and does not require compressed air.
Observe country-specific Regulations. Some countries have legal regulations which require regular safety inspections of electrical devices or systems by the operator.
Perform maintenance regularly. Have maintenance performed on your unit annually by trained technical personnel / a service engineer.
Observe error messages. You must observe error messages shown on the display. If the error message does not disappear even after you have performed the prompted action, contact our servicing team.
Once a month:
Do not confuse the block screw with the ball pressure screw
When operating a CEREC 3 milling unit and a CEREC MC X grinding unit in the same room, be careful not to confuse the block screw of the CEREC 3 with the ball pressure screw of the CEREC MC X.
Using the tank cap opener
If you find the tank cap, tank drain or filter insert hard to open by hand, use the tank cap opener.
Wear of the ball pressure screw
The high clamping forces cause wear of the ball pressure screw.
Replace the ball pressure screw every 500 clamping operations.
Damage to the pump and grinding drives
An excessively high ceramic content in the cooling water will damage the pump and grinding drives. Change the water regularly.
When the water is due to be changed, a message window appears on your monitor to remind you that it is time to change the water.
Preventing odours
All grinding additives contain a biologically degradable preservative. Despite this, however, odours may still develop under unfavourable conditions.
Observe the following:
Damage to surfaces
When undiluted, DENTATEC grinding additive etches plastic surfaces and can cause discolouration.
Use only DENTATEC as a grinding additive.
Water tank MC X

Foaming is not permissible. If any cleaning agents are used, this will create foam, which is not permitted. Do not use any cleaning agents.
To change the water, make sure:
✔ The unit is switched on.
✔ No matching process is running.
Then proceed as follows:
1. Pull out the water tank at the front of the unit.
2. Open the drain opening.
3. Drain the water tank.
4. Turn the tank cap counter-clockwise and take it off. If you find the tank cap hard to open by hand, use the tank cap opener.
5. Remove the filter insert from the tank and clean the filter thoroughly under running water.
6. Rinse the water tank.
7. Insert the cleaned filter with handle into the tank and press it firmly onto the base in the floor of the tank.
8. Close the drain opening.
9. Add approx. 75 ml of DENTATEC to the tank.
10. Fill the tank with water until the filter insert is completely immersed (up to the bottom edge of the cover thread, approx. 3 litres).
11. Wait briefly until the filter insert is completely soaked then add appropriate amount of water.
12. Close the water tank by tightening the tank cap (B) clockwise by hand. Do not use the tank cap opener for this.
13. Push the water tank back into the housing.
Regular replacement of instruments
Change the instruments as soon as the system prompts you to do so.
1. In the software, navigate to the system menu, and click on the "Configuration" button.
2. Click on the "Devices" button.
3. Click on the unit whose instruments you wish to replace.
4. Click on the "Start" button. The motors travel to the change position for the instruments. The dialog box for changing the instruments opens.
5. Press the catch of the grinding chamber door and open the door.
Risk of injury on instruments
If you put your hand in the grinding chamber, you could injure it on the instruments. Be careful not to brush against the instruments with your hand. Apply the torque wrench as shown.

6. Loosen the worn-out or defective instrument with the torque wrench and pull it out manually.
Do not grease the instrument. Insert the new instrument into the motor mount by hand. Tighten the corresponding chuck with the torque wrench until a clicking sound can be heard.

Faulty grinding results: Interchanging instruments leads to faulty grinding results.
7. Close the grinding chamber door.
8. Select the instrument(s) you have inserted on the PC monitor and click "Start". You can also select the instruments on the grinding unit (up/down arrow) and confirm with "Start".
The cooling water nozzles in the grinding chamber always must be kept free of lime and grinding dust deposits. The corresponding cooling water jet must always strike the instrument accurately.
✔ The cooling water nozzles are dirty.
Clean the nozzles with a cleaning wire and the SPRAYVIT syringe (if available).
Use only suitable instruments. Do not use any instruments from CEREC 2 or CEREC 3 units.
If an instrument breaks during the production phase, the corresponding motor travels to the change position. A dialog box which marks the side with the broken instrument with a red cross then opens. This means the instrument is broken.
To replace a defective instrument:
1. Change the defective instrument as described above.
2. Select the instrument which you have inserted.
3. Press the "Start" button.
Cleaning surfaces
Use only cleaning and care agents which have been approved by Sirona.
Do not allow liquids to run into the ventilation slots.
Disinfecting
Wipe surfaces down with a surface disinfectant (wiping disinfectant). Observe the manufacturer’s instructions regarding restrictions for use.
Protection against medicaments
Due to their high concentrations and the substances they contain, many medicaments can dissolve, etch, bleach or discolour surfaces.
Damage to the surface
Clean the surface immediately with a moist cloth and a cleaning agent.
Cleaning
Remove dirt, grime and disinfectant residue regularly using mild, commercially available cleaning agents.
Electric shock: Disconnect the power plug at the unit end before replacing the fuses.
Use only fuses of the same type in the fuse holder.

The power plug must be disconnected.
1. Use a screwdriver to carefully pry off the cover of the fuses on the back side of the unit.
2. Pull out the fuse holder.
3. Replace the defective fuses.
4. Reinsert the fuse holder.
5. Close the cover.
Change the filter regularly. Clean the filter regularly and change it immediately when damaged, otherwise change it every three months.
If a message appears stating that the water pressure is too low, you must clean the filter or, if it is damaged, replace it immediately.

Make sure that:
✔ The tank is empty, see below section Removing water from the unit.
Then proceed as follows:
1. Pull out the water tank at the front of the unit.
2. Turn the tank cap counter-clockwise and take it off. If you find the tank cap hard to open by hand, use the tank cap opener.
3. Taek the filter insert out of the tank.
4. Rinse the water tank
5. Insert the new filter with handle into the tank and press it firmly onto the base in the floor of the tank.
6. Fill the tank, see above section Changing the water.
7. Close the water tank by tightening the tank cap clockwise by hand. Do not use the tank cap opener for this.
8. Push the water tank back into the housing.
Clean the filter approximately every 12 to 15 units under running water, but at least with every water change.
You must remove water from the unit if you will not be using it for a long period of time or wish to transport it.
Make sure that:
✔ No grinding process is running.
Then proceed as follows:
1. Switch off the unit.
2. Pull out the water tank at the front of the unit.
3. Drain the water out of the water tank through the drain opening and reinsert the water tank in the unit.
4. Switch the unit on.
5. Pump button active at power-up. The "Pump" button appears on the display when the grinding unit is switched on. You can start or stop the water pump by pressing this button.
6. Press the "Pump" button to switch the pump on. The water pump then starts pumping the water out of the unit. Let the pump run until no more water escapes from the nozzles.
7. Press the "Pump" button to switch the pump off.
8. Pull out the water tank and empty it.
9. Push it back into the housing.
Risk of damage to the tank
Use the tank cap opener only for opening the tank cap and tank drain. Do not use the tank cap opener for closing the tank cap. To close the tank cap and tank drain it is sufficient to tighten them clockwise by hand.
Make sure that:
✔ The water tank has been pulled out and drained.
Then place the tank cap opener on the tank cap as shown and take off the tank cap by unscrewing it counter-clockwise.

Make sure that:
✔ The water tank has been pulled out.
Then place the tank cap opener on the filter drain as shown, and take off the filter drain by unscrewing it counter-clockwise.

Future-proof your equipment today with our service contracts
We know an unexpected breakdown in your practice can be a headache for you and your patients - which is why we have put together a choice of 3 different service contracts to suit all budgets.
Annual service
To get optimum performance from your equipment and to conform to manufacturer’s recommendations, an annual service could be just what you’re looking for. These are carried out by our accredited team, who are all trained in-person by the manufacturer before they are sent to your practice.
Emergency breakdown service
We are never far away in an emergency. Unplanned breakdowns are a headache for any surgery. We are more than happy to help.

Henry Schein Financial Services have access to a vast range of financial products and services that are offered by companies UK wide. If you seek financial support from a tied agent or company representative, they may only be able to advise and offer products from the company they represent but this is where we differ. Talk to us today about our range of equipment finance options or building works loans.
Our equipment team will use the information you provide to respond to your query as promptly as possible.
You could ask about a FREE one-to-one consultation with one of our specialist team, quotation, demonstration of the latest equipment, or any other question you may have in helping you make an informed decision.
Got a question you can't find an answer for? Pop it in the box below and we'll get back to you as soon as possible.
Henry Schein UK Holdings Limited t/a Henry Schein Dental is a limited company registered in England and Wales under registration number 11584480 and VAT registration number 573778979. Its registered office is Medcare House, Centurion Close, Gillingham Business Park, Gillingham, Kent, ME8 0SB.
Henry Schein UK Holdings Limited is authorised and regulated by the Financial Conduct Authority and is entered on the Financial Services Register under firm reference number 708571. Henry Schein UK Holdings Limited is a credit broker and not a lender.